“Club Joker” stripes – professional fitment.

DSC_6263s

The club joker stripes are one of out more popular reproduction sticker sets.
And the full colour printed ones are possibly one of the best stickers that VW ever fitted to the T3 🙂

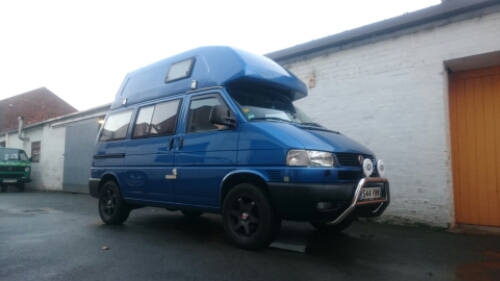
Michael fancied a little 80s styling on his Bluestar, and we wanted the opportunity to make a video to give some tips. So, we had a one of set done with a blue highlight instead of the original red.
Generally with things like this, less is more… but this works really well!

You can see the installation video on Youtube HERE

And of course the stripe kits are available HERE (standard colour set only I’m afraid. Special colours would be possible… but expensive!)


And here starts the nightmare.

image

Simple job, import van, just come in from Lapland.
We’re just going through it undoing the “modifications” (in the loosest sense) and generally getting it ready for UK use.
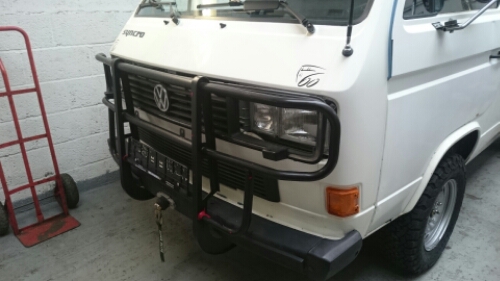
One of the problems is quite simple, the front side lights don’t work.
Anyone spot the problem yet?
Yes, we can’t get the grille off, so we can’t take the head lights out so we can’t change the bulbs without unbolting the clothes horse off the front.
Deep joy. Simple job we don’t normally charge for turns into an hours labour!

Recent MOT pass…

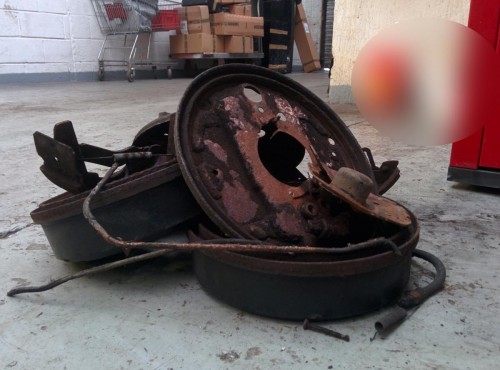
Back Plates. Rotten.
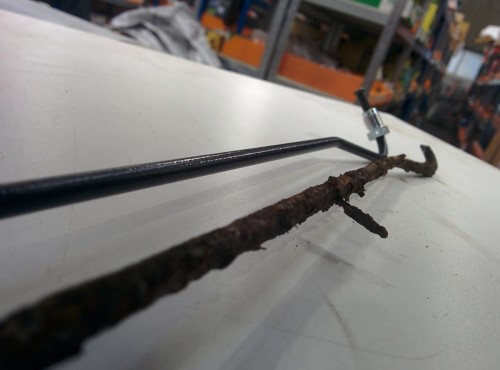
Brake Lines. Rotten.
Brake Flexis. Perished.
Brake Shoes. Worn.
Brake Drums. Worn.

And this is many peoples only Annual inspection and some vehicles aren’t even required to have it!
*sigh

IMG_20160106_143146

IMG_20160105_111849

Working with polyamide tube.

Replacing fuel lines on old VWs seems to be one of those popular things to do at the moment.
The composition of our fuel has changed and we keep hearing all those horror stories on forums about vans going up in smoke due to perished fuel lines.
The thing is, it’s usually only the end rubber sections that fail however what usually happens is that some do-gooder has gone and replaced the lot with rubber, front to rear! It’s a common situation and why we have started manufacturing replacement fuel feed and return pipes to be sold as a complete item and to put the van back to how it should be.
The hard plastic fuel lines are made from a material called “Polyamide” and are very robust, not only chemically but they also resist abrasion very well if clipped into place as they should be.
The polyamide tube we sell is manufactured to DIN 73378.
Polyamide tube is really easy to work with so we thought we would put a quick page together to help you understand some of the products a little better and to give a little more confidence in working with this robust, durable and cost effective fuel line.

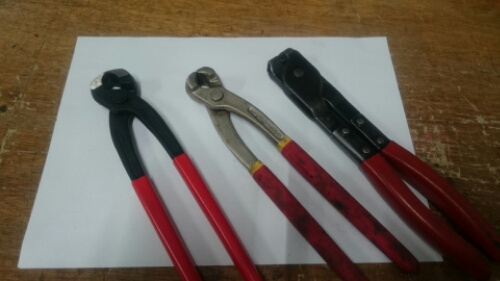
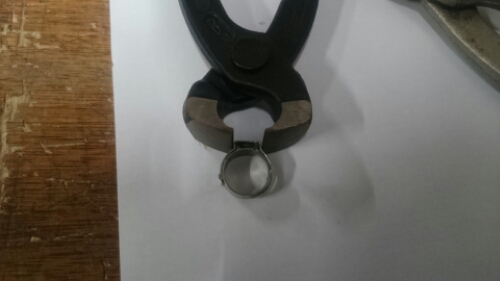
Oetiker clip closing pliers.
A selection of Oetiker clip closing tools, all work well. Left: Genuine Oetiker closing pliers. Middle: Common or garden pincers and… Right: Professional closing pliers.
Genuine Oetiker closing pliers.
Genuine Oetiker clip closing pliers, nice and sharp and produce an attractive crimp.
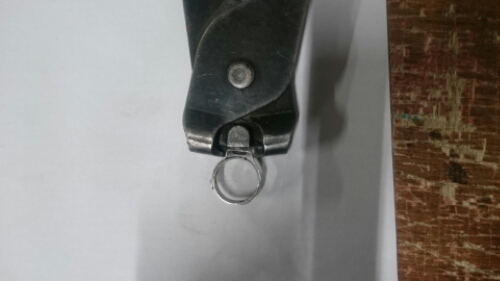
Workshop tool.
The tool we use in the workshop, it has an extra heel to keep the ear of the clamp bulging too far, great for CV boot clips.
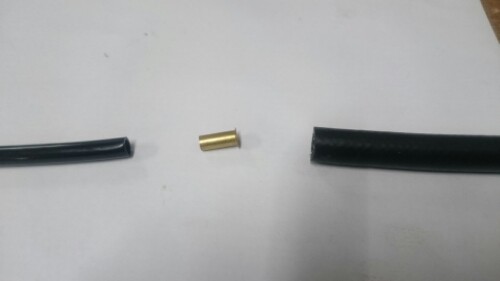
Pre-mating.. foreplay if you must
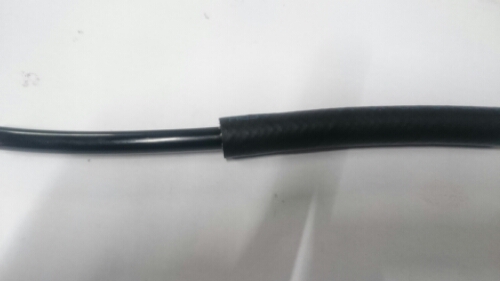
To the left, 8mm OD polyamide tube, the brass section in the middle is a reinforcing sleeve and to the right our 7.3mm FPM fuel hose.
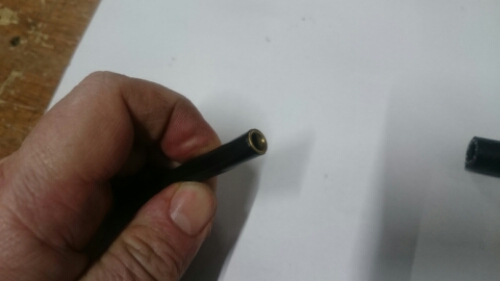
Sleeve meets tube
Easy bit, push the reinforcing sleeve into the end of the polyamide tube all the way up, as far as it goes. The sleeve is there to stop the polyamide tube getting crushed when hose is clamped over the top.
Rocket science
The, over goes the FPM, easy huh. push the hose over the poly tube by about 15mm, about the same length as the reinforcing sleeve.
Centring the clip
Centre the clip over the reinforcing sleeve.
Crimp.
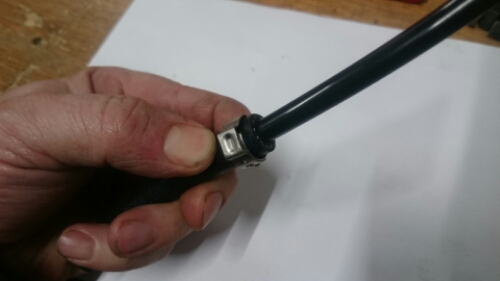
Over goes the Oetiker clip, these are stainless steel so perfect for use underneath the van.
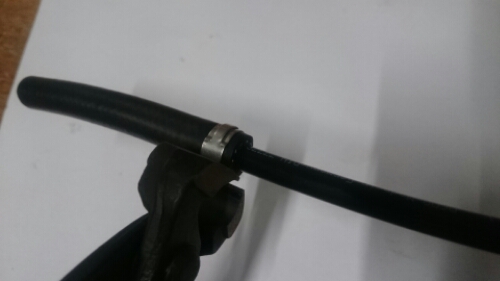
Hug me, squeeze me, hold me tight.
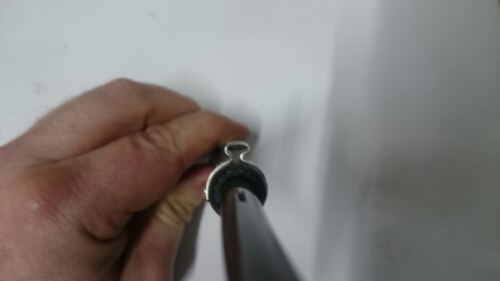
The Oetiker clip is clamped up to leave a 1mm or so gap between the 2 opposing bits of the clamp.
I can see right through you..
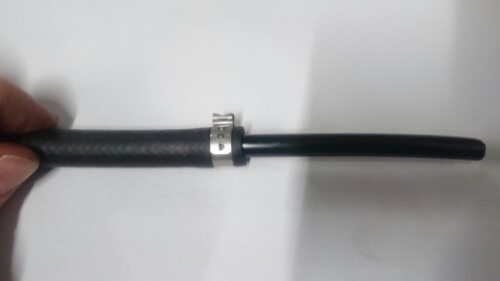
Here you can see there is still an air gap in the ear of the clamp. 1mm or so is what you are aiming for.
Polyamide
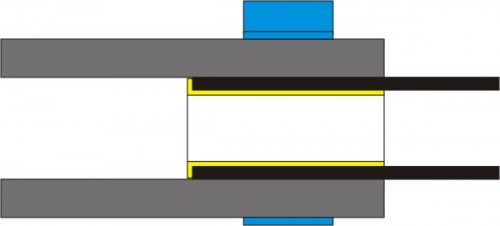
Here is a poor representaion of the cross section of a completed joint. Black: Polyamide tube, Grey: Fuel hose, Yellow: Reinforcing sleeve, Blue: Oetiker clip

When it comes to sizes you need quite a tight fit, for a 8mm tail such as the output from a fuel tank you need 7,3mm fuel hose, the same goes for 8mm OD polyamide, 7,3mm ID fuel hose.

For 6mm tails or polyamide tube you use 5.5mm ID hose.

Polyamide tube and reinforcing sleeves can be found here

Decent quality fuel hose can be found in this section. [look for the FPM]

Oetiker clips can be found here. The correct sizes are in related products on the hose pages though.

Closing tool for Oetiker and CV boots but you can use normal pincers.

Or, if you want to buy it already done then we have a couple of kits already made.

2.0l AC “CU” engine fuel feed kit.

1.9l WBX “DG” Engine fuel feed kit.

To fasten the pipes down the length of the chassis…

Omega clip

The change hose size.

8mm to 6mm reducer

12mm to 8mm reducer

For making removable connections to the fuel tank, filters etc..

For 5.5mm hose / 6mm tail

For 7.3mm hose / 8mm tail

Hopefully that should give you a little insight into this great product and help you save some money by not ditching the PA and swapping the lot for rubber!

On the First Day of Christmas, Brickwerks sent to me….

…Nothing.
No Partridge in a Pear Tree will be shipped.
No Lords, leaping or otherwise will be sent to anyone.
No Gold Rings, or French Hens.
And not just because we don’t sell any of that guff. We’re closed from midday on Christmas Eve, and we won’t return to work until the 11th Day of Christmas – the 4th January.

xmas2015

We’ll be shipping orders right until we close, but obviously the closer to Christmas it gets the less likely you’ll be to get a Next Day delivery 🙂
Anything shipped on Thursday should be delivered between the Christmas and New Year period.

We’ll be back in on the 4th January… no doubt a few pounds heavier, and a little “lethargic” but we’ll ship all orders placed over the festive season on that first day back and then usual service will be resumed until we do it all again next year!

All that remains is to say thanks to all our customers, old and new for your support.
Its been a fantastic year!
Enjoy the holidays, whatever you’re doing, and we’ll hopefully see you all again next year for more of the same…

Seat belt upper mount


We’ve sold rear seatbelts for the T3 for a good many years now, initially designed for retro fitting into the rear of a Westfalia T3 models but soon people were asking if we could adapt the kit to suit panel van conversions, naturally we obliged.
The way we got around the lack of factory mounting points was to use universal strengthening plates, it was a solution that worked but could have always been better.
We recently broke a knackered old T3 Caravelle and as some of you know that they had factory seat belt mountings (Models 251 and 252 don’t have factory seatbelt mountings, basically Panel vans where models 253 to 256 Kombi/Caravelle have factory seat belt mountings) so we chopped out the panels and the strengthening, drew them up and sent them off to the machine shop for fabricating.
Naturally with most UK converted “campervans” starting life as basic panel vans they don’t have the factory fitted seatbelt mountings these brackets should help a nice tidy seatbelt install for some customers.
The factory design as been ever so slightly adapted to allow retro fitment without welding and retains the strength that VW built in.

For some reason we’ve sold loads of seatbelts recently but we haven’t been asked to fit any so when we had the opportunity to fit one for a customer the other day it seemed like a perfect opportunity to take a few pictures.

Van was a late Auto-sleeper, obviously we needed to strip out the rear panelling first.

Tools required.

  • Scissors [to cut out the drilling template]
  • Centre punch.
  • Drill
  • 5mm drill bit
  • 17mm drill/hole saw/cone cut.
  • Rivet gun.
T3 Seatbelt template
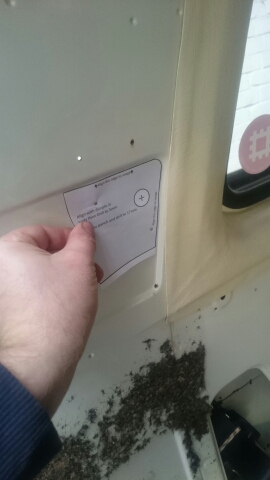
First start by cutting the template out, there are 2 supplied, one for the left, one for the right. Align the circles on the template with the dimpled in the bodywork.
T3 seatbelt centrepunch.
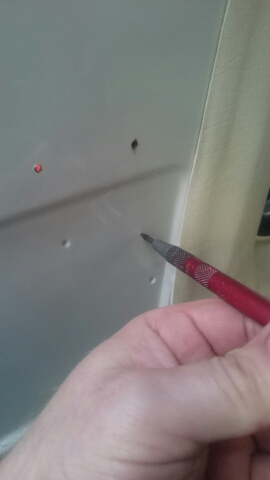
Centrepunch through the template to mark where to drill the hole for the seatbelt mounting. Yes, we know, there is no template in the picture! I centre punched it lightly and this was me going over the mark.
Drill
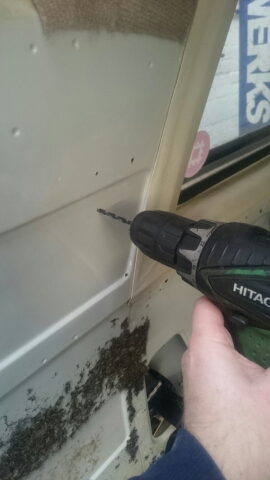
Using the 5mm drill, drill out the rearmost dimple, this hole will be used to rivet the plate into place.
Drill drill drill.
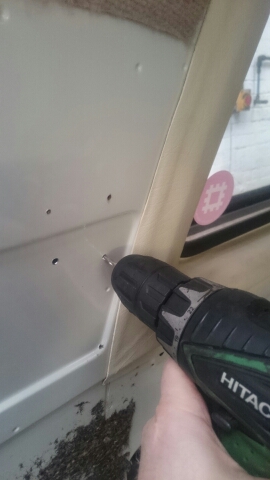
….and then drill the centre popped mark.
Punch!
Instead of drilling this hole we used a sheet metal punch that bolts together, the bolt in the middle is tightened and it punches a nice clean hole out. You could use a drill bit, a hole saw or a cone cutter/step drill to do this but please be careful not to mark the panel behind!
Prime and paint.
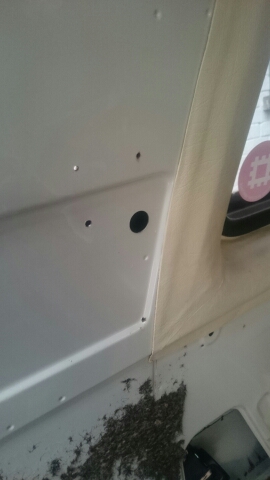
Once the hole is punched through then prime and paint any bare metal edges.
image
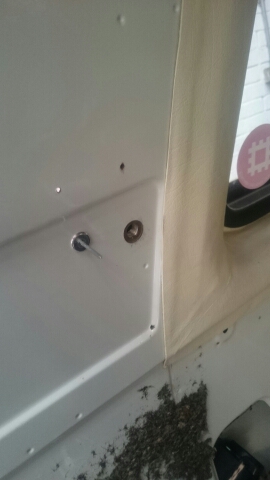
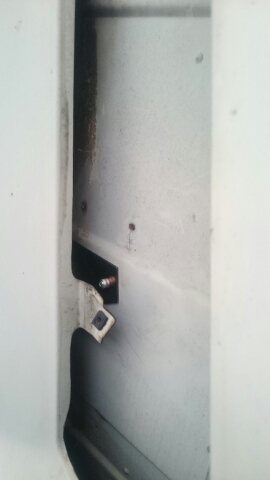
Once the paint is dry it’s time to slide the mounting plate into place. You’ll have to take the rear pillar vent out to do this. Align the plate using the rivet and dimple in the metalwork.
image
View of the riveted plate in situ with the plastic vent removed.
image
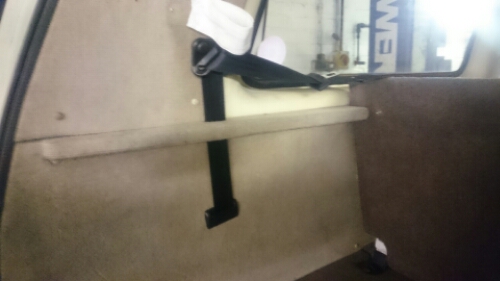
View of seatbelt loosly fitted inside the panel.
image
All back together, trim panel fitted and the parcel shelf bracket trimmed for free movement of the belt.

Seatbelt mounting bracket
Seatbelt kit – Rear Left
Seatbelt kit – Rear Right
Seatbelt trim – T3 / T4
Seatbelt mounting bracket – Bulkhead
Outer mounting brackets – Left and Right


Fuel Tanks… and associated gubbings.

One of the most common enquiries we get is with regard to changing the fuel tank.
T3’s are at that age now where if they are still on the original tank theyre very likely going to need replacing soon. So heres a little bit of information regarding tanks, and the parts that commonly need replacing when we change them.

Firstly, you’re taking the tank out, so whilst you’re doing it take the opportunity to check out whats above it, Clutch pipes, Brake Pipes, Power steering pipes, and the floor of the vehicle itself. If theyre all good, get something on there to protect them so they’ll stay that way!

fueltank

Tanks… there are 3 different tanks. Early, Late, and Fuel Injection.

We’ll start with the Fuel Injection tanks as they’re the simplest.
If you have a fuel injection engine you need a fuel injection tank. This applies to standard engines and engine conversions. The difference is a larger outlet to the pump.

Early tanks were fitted up to 1985, they have a large opening for the filler neck (68mm) and the original filler neck was metal. Petrol, Diesel… all the same (except Fuel Injection!).
If you have a metal filler neck you have an EARLY Tank. Simple.
Well… not quite… see note below.

Late tanks  were fitted 1985 on. Ignoring Fuel Injection engines, they are all the same again for Petrol and Diesel. They had the plastic filler neck and smaller 48mm filler hole.
So, post 1985, plastic filler neck, small hole, carb or Diesel engine… LATE tank


Like most things, its never quite that simple!
At some point after 1985 when VW realised that the metal filler neck wasn’t a great idea (anyone who has had old Golfs or Sciroccos will know all about this!) they stopped supplying a steel filler neck as a replacement part, and instead supplied a later plastic neck with a larger seal to convert the early tank.
What this means is that if you have a metal filler neck you certainly have an early tank, but just because you have a plastic one it doesn’t necessarily follow that you have a late one! The simplest way to tell for sure is to look through the hole in the chassis, you’ll be able to see the rubber seal. If need be, send us a photo and we should be able to ID it.
If you do have an early tank with a plastic filler neck (utilising the larger seal), you’re better off swapping to the late tank and normal seal… why? Simply because the seal is about £5 cheaper 🙂

Okay, that’s the tank out of the way. So what else do you need?
Its a tricky one. We replace a lot of tanks, and a lot of the time the original components can be re-used. A lot of the time some need replacing. Sometimes they all need replacing. Some things might not need replacing, but it kind of makes sense as its all in bits anyway. So, we can’t really tell you exactly what you’ll need… just give you a breakdown of all the parts available.

Well start at the filler neck and work down.
Filler Surround:
https://www.brickwerks.co.uk/index.php/t3-fuel-filler-surround.html
and Seal:
https://www.brickwerks.co.uk/index.php/fuel-filler-neck-rubber-t3.html
Retaining ring for seal (we fit a stainless one, but we also have a cheaper steel one):
https://www.brickwerks.co.uk/index.php/fuel-filler-neck-metal-ring-stainless.html https://www.brickwerks.co.uk/index.php/fuel-filler-neck-metal-ring-steel-with-screws.html
And the hose clip for the neck seal.
https://www.brickwerks.co.uk/index.php/fuel-filler-neck-metal-ring-steel-with-screws.html

Then, to the bottom of the filler neck (The plastic filler neck itself rarely fails and isn’t available):
Early Seal:
https://www.brickwerks.co.uk/index.php/fuel-tank-filler-grommet-t3-early-68mm.html
Late Seal:
https://www.brickwerks.co.uk/index.php/fuel-tank-filler-grommet-late-48mm.html
And the seal to allow a plastic filler neck to be used on an early tank:
https://www.brickwerks.co.uk/index.php/fuel-tank-filler-grommet-t3-convert-early-late.html

Onto the tank itself…
There are 3 grommets in the top of the tank for the breather system. At the time of updating this only aftermarket are available:
https://brickwerks.co.uk/product/breather-grommet-t3-fuel-tank-all-2wd-alternative/
And the breather balance pipe:
https://brickwerks.co.uk/product/fuel-tank-breather-balance-pipe-t3-2wd/
Braided hose from the breather pipe to the arch tanks (1metre will replace them all):
https://www.brickwerks.co.uk/index.php/5-5mm-textile-overbraid-hose.html
or if you want to fit the really good stuff:
https://brickwerks.co.uk/product/fuel-hose-ethanol-bio-safe-5-5mm-2/

Then the sender… 2 options, early and late:
https://www.brickwerks.co.uk/index.php/fuel-level-sender-t3-2wd-upto-1986.html
https://brickwerks.co.uk/product/fuel-level-sender-t3-86/

And the sender seal. Tanks come with a new seal. Throw it away, they’re hard and almost impossible to fit properly. Likewise the seals that come with the level senders.
Often the best seal is the one you remove from the old tank! If you do want to fit a new seal, its this one:
https://www.brickwerks.co.uk/index.php/fuel-level-sender-seal-t3-2wd.html

And that should do you… we’d also recommend something to coat the tank and protect the area above the tank. We use Dintrol, one can should be enough to do the tank and above.

https://www.brickwerks.co.uk/index.php/dinitrol-4941-underbody-sealant-0-5l.html
https://www.brickwerks.co.uk/index.php/dinitrol-4941-underbody-sealant-1-0l.html

As always, our “Early/Late” calculator may help with identifying what you have from your chassis number.

There you go, I dont think we’ve missed anything… theres more you could replace but thats the stuff on the tank itself.
 

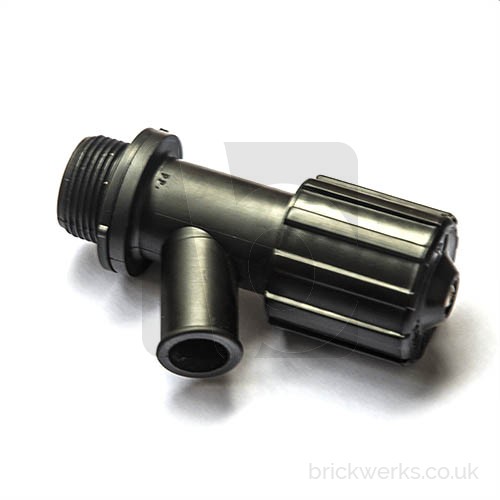
Waste Water Tank Caps – T3 Westfalia

As a workshop we fix the stuff we sell parts for… and there is nothing worse than having the dregs of a  customers dirty dish water dripping on you as you walk under the ramp.

On a Westfalia its either a missing or damaged drain tap, or the large cap missing or not sealing.

We now have both in stock at a great price… so if you send your Westy in for repair with a leaky/missing one, don’t be surprised if it gets replaced 😀

t3w070135d

Webshop Link – Tap

t3w070814b

Webshop Link – Cap

Trial fitting of T3 syncro pre bent brake pipes

image

We’ve had these particular brake pipes sat in a box awaiting the opportunity to trial fit them. Brand new steel, copper coated, epoxy covered pre bent and flared with the correct fittings.
Made exclusively for us by an OEM supplier to all the car brands you’re bothered about. Using original samples these pipes are perfect for those who want to achieve a perfect replacement pipe without the hassle of bending and flaring your own. Saves time as you can just fit from the box. Made using original samples.
Now we know the fit is good we’ll add these syncro items to our growing range of pre bent pipes very soon.